
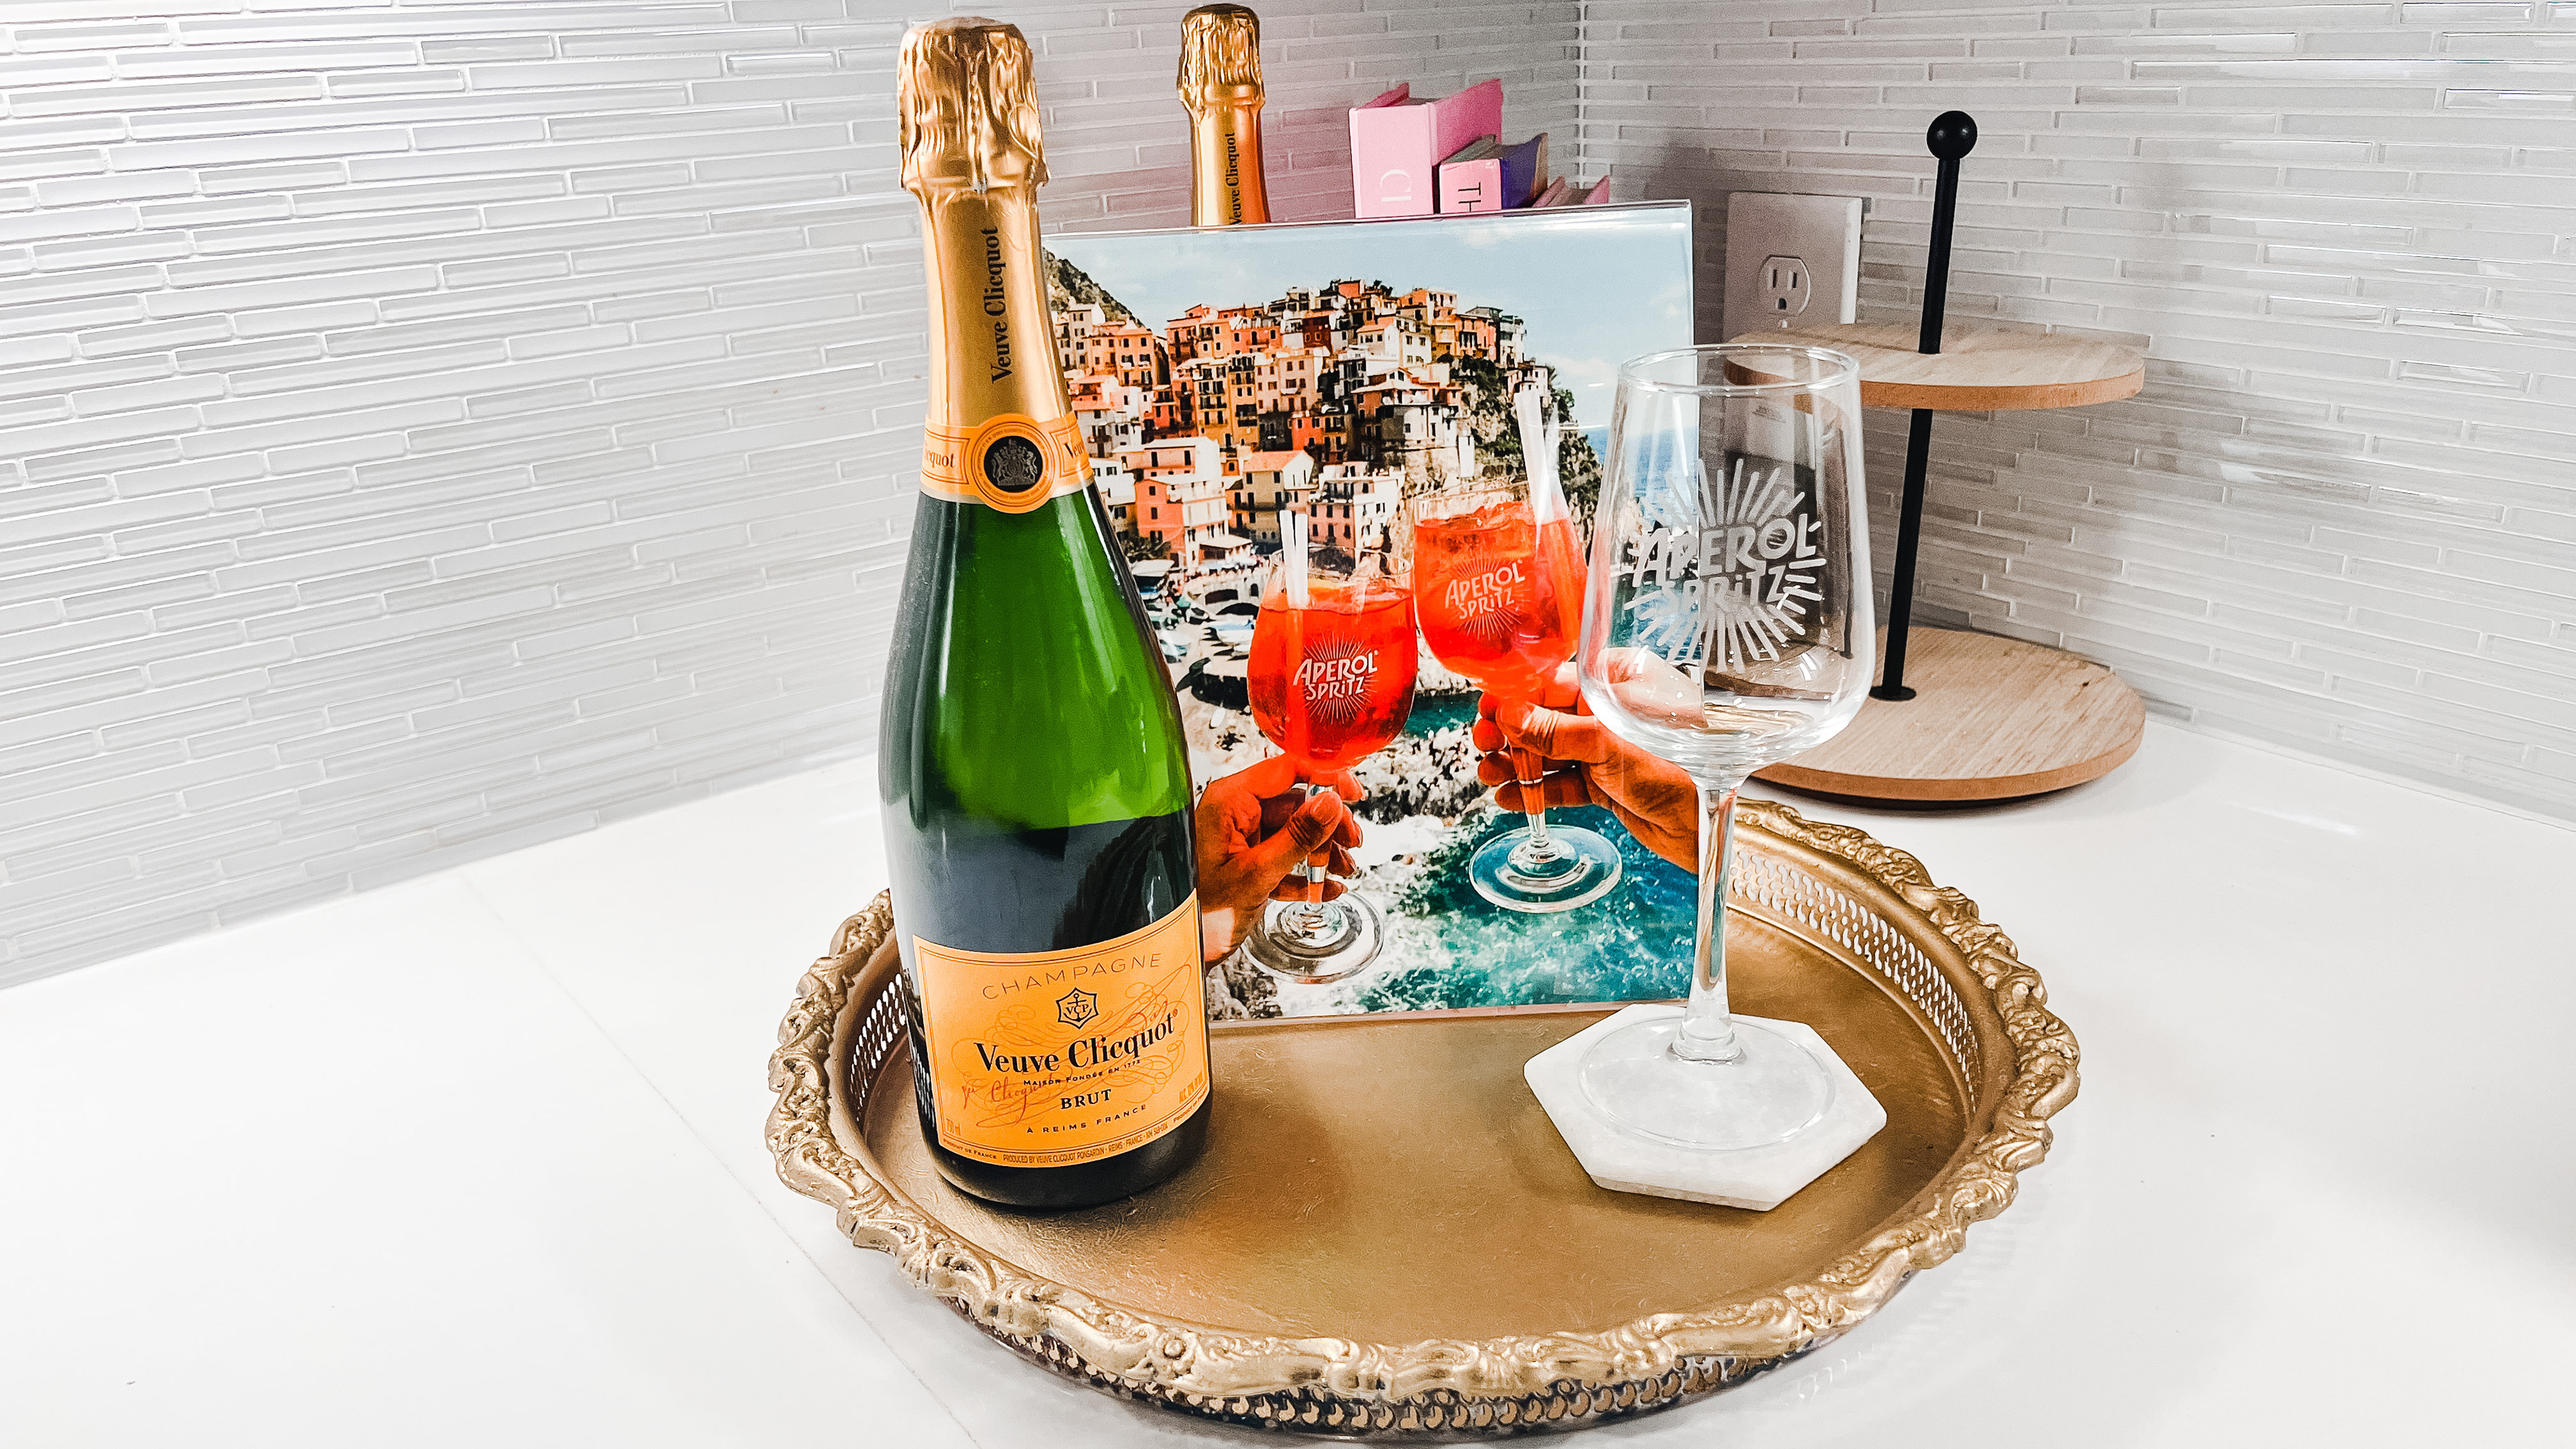
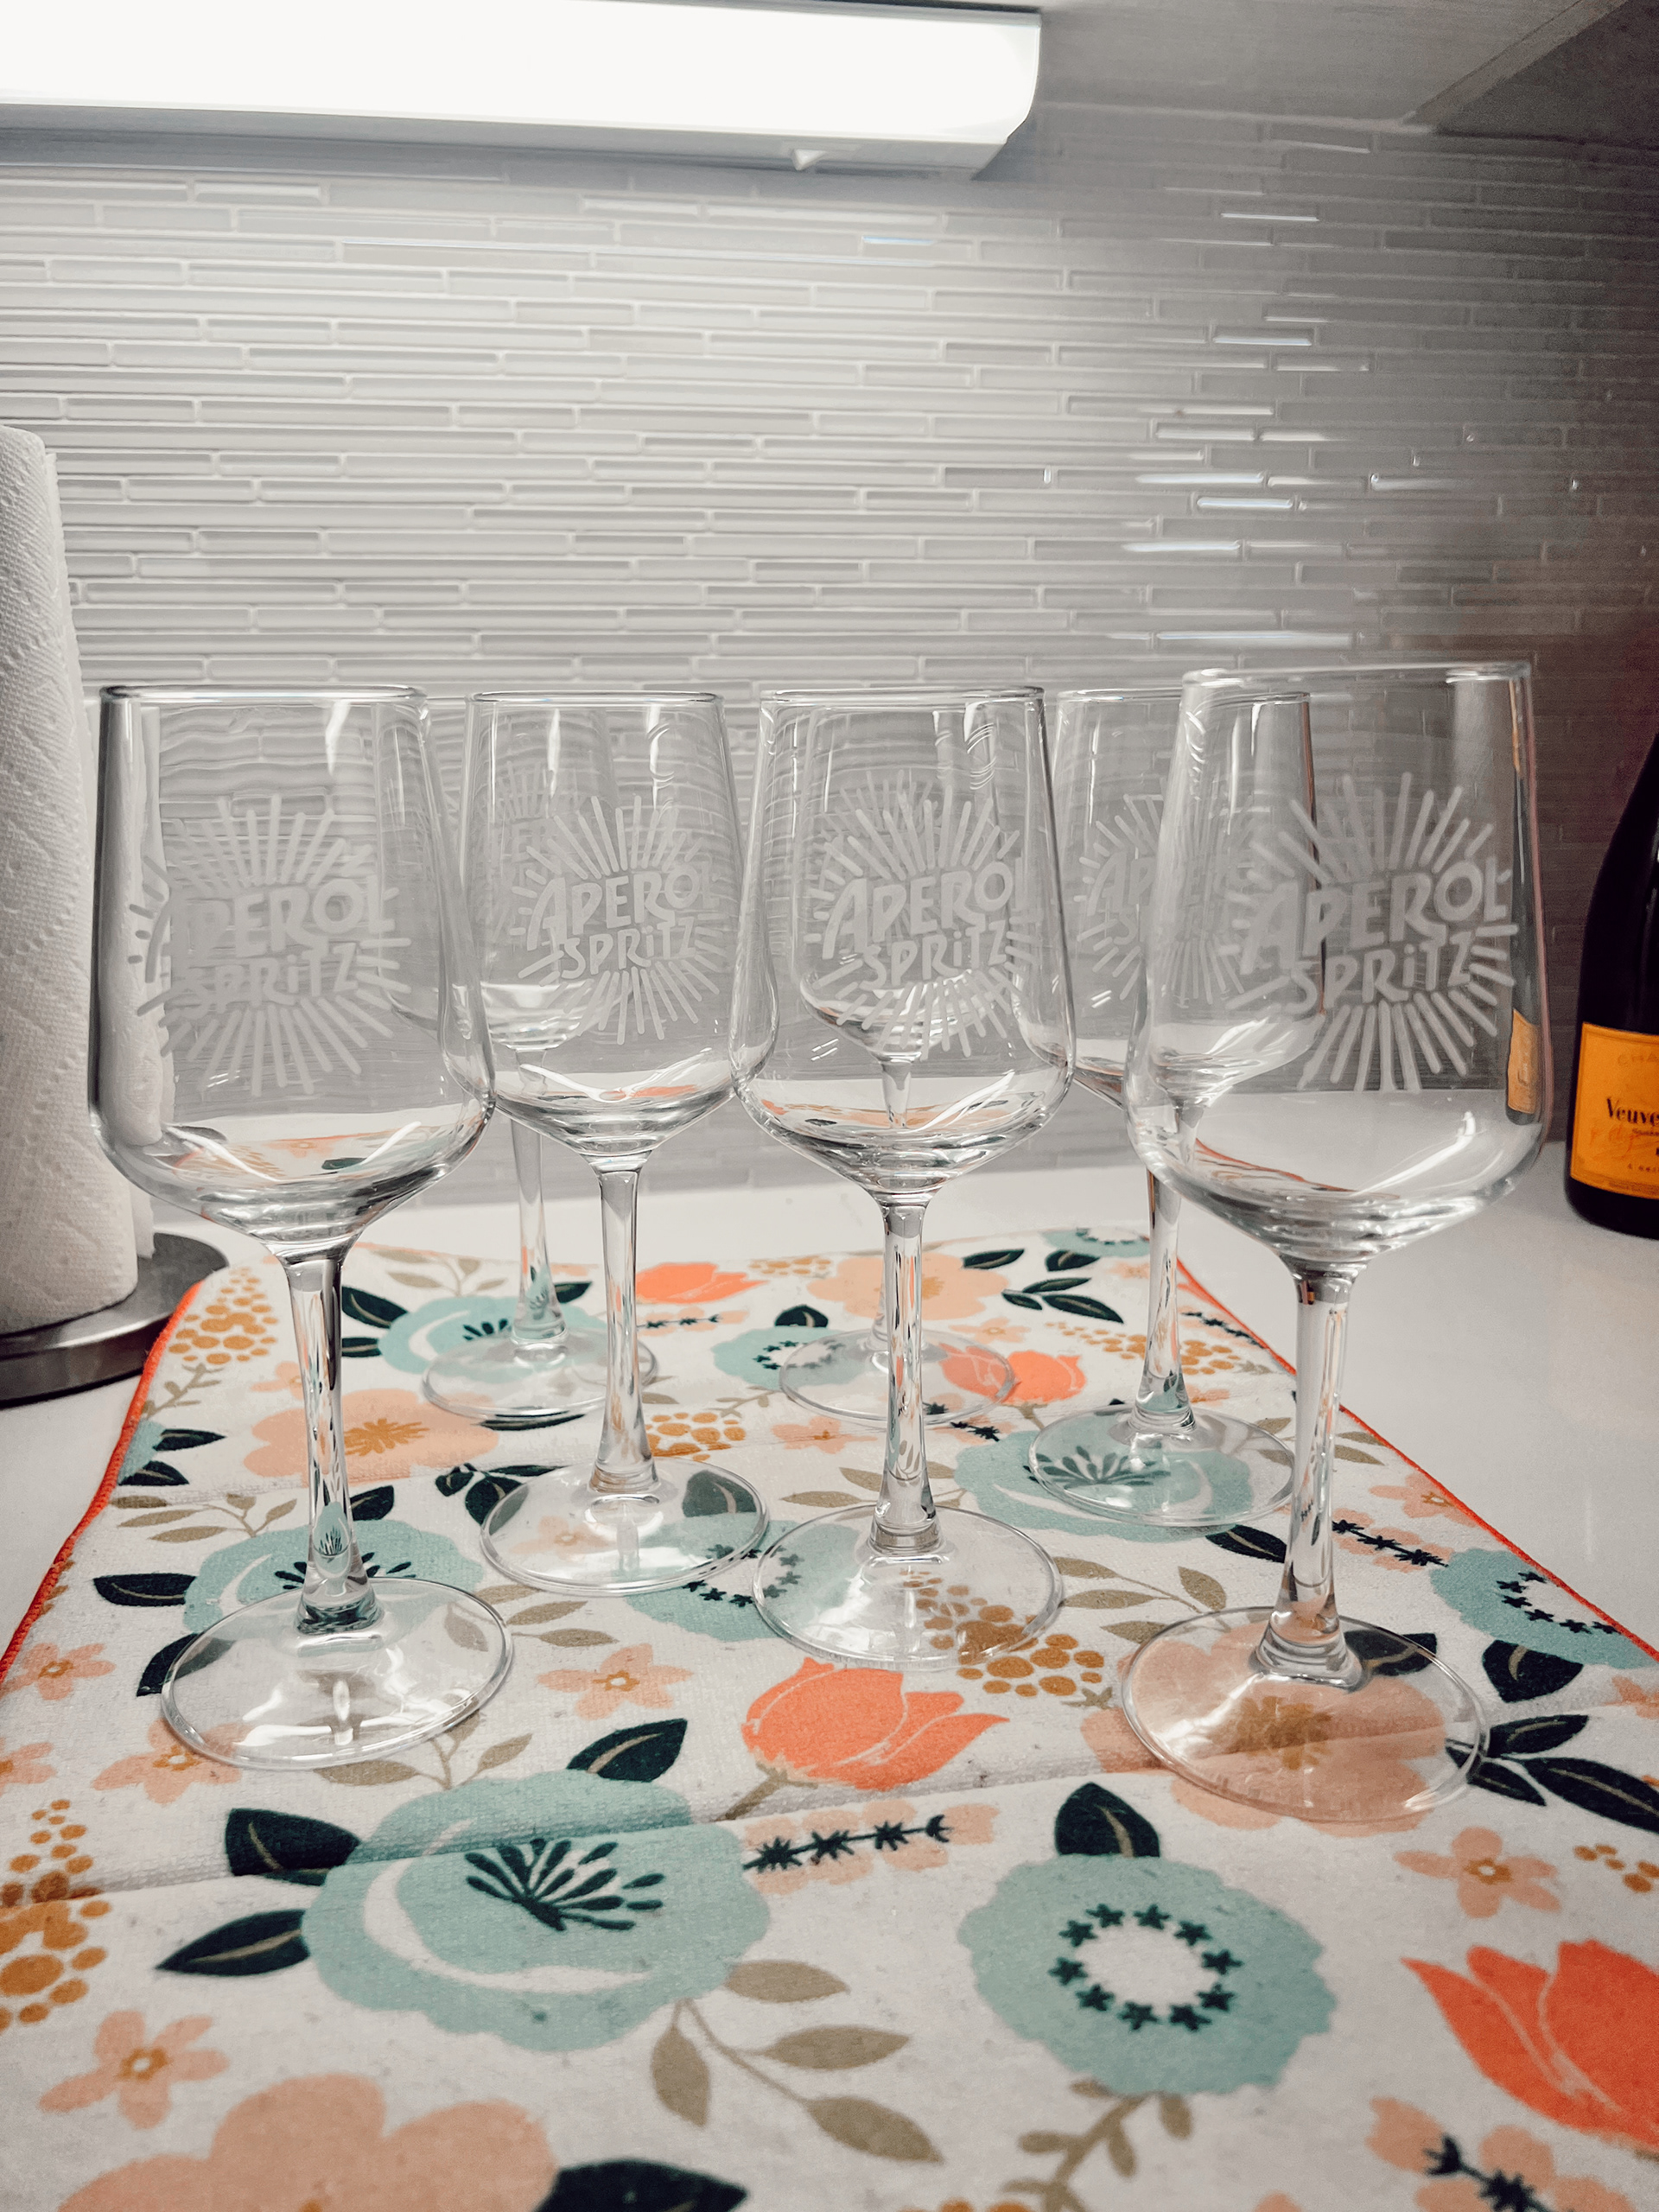
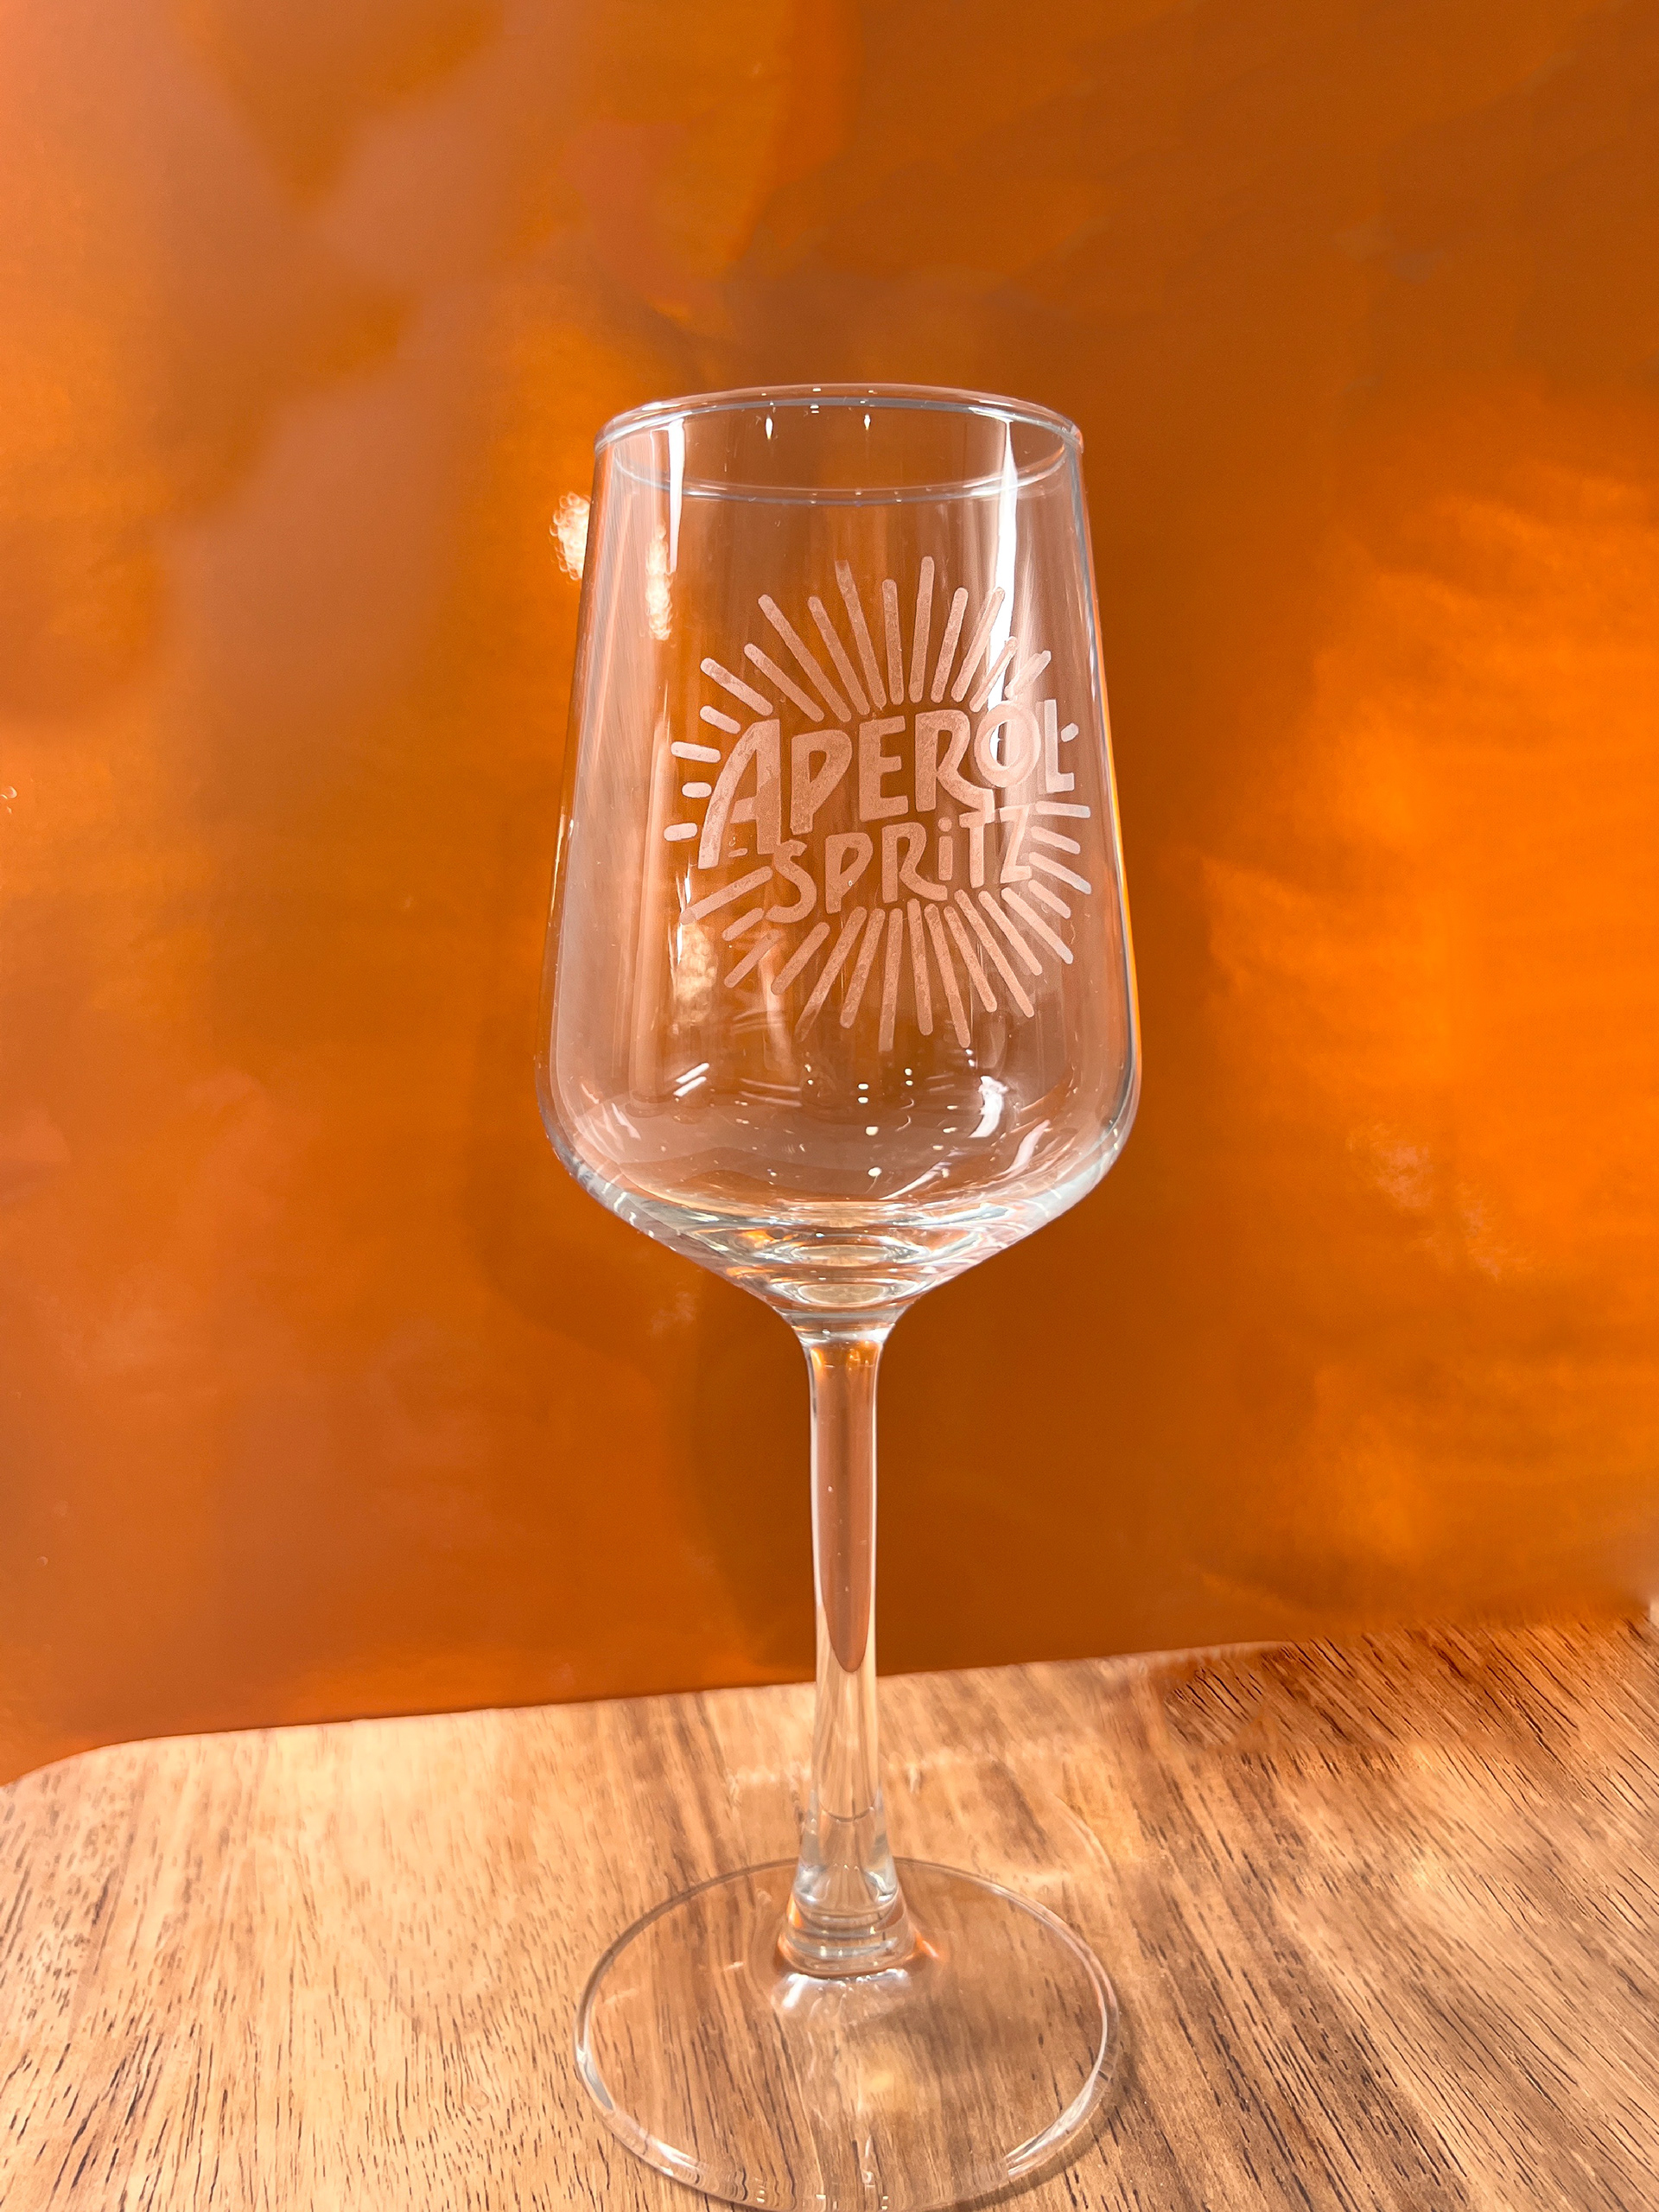
As soon as I decided to throw this party I kew I wanted to have those branded Aperol glasses you always see photos of with a European beach in the background. However, my wallet was not necessarily in agreement. That's when DIY comes in. Since I was throwing a large party, I ordered this pack of wine glasses off of amazon (they're intended for a wedding and come out to $3.16 a piece). But for an even cheaper alternative you can check goodwill (& wash them on the sanitize setting of your dishwasher) or dollar tree!
Then I cut out the Aperol logo on stencil vinyl on my Cricut (I thickened up the lines on the logo to make weeding less terrible) and used etching cream. For a full tutorial on how I created these glasses click the link:
APEROL koozies
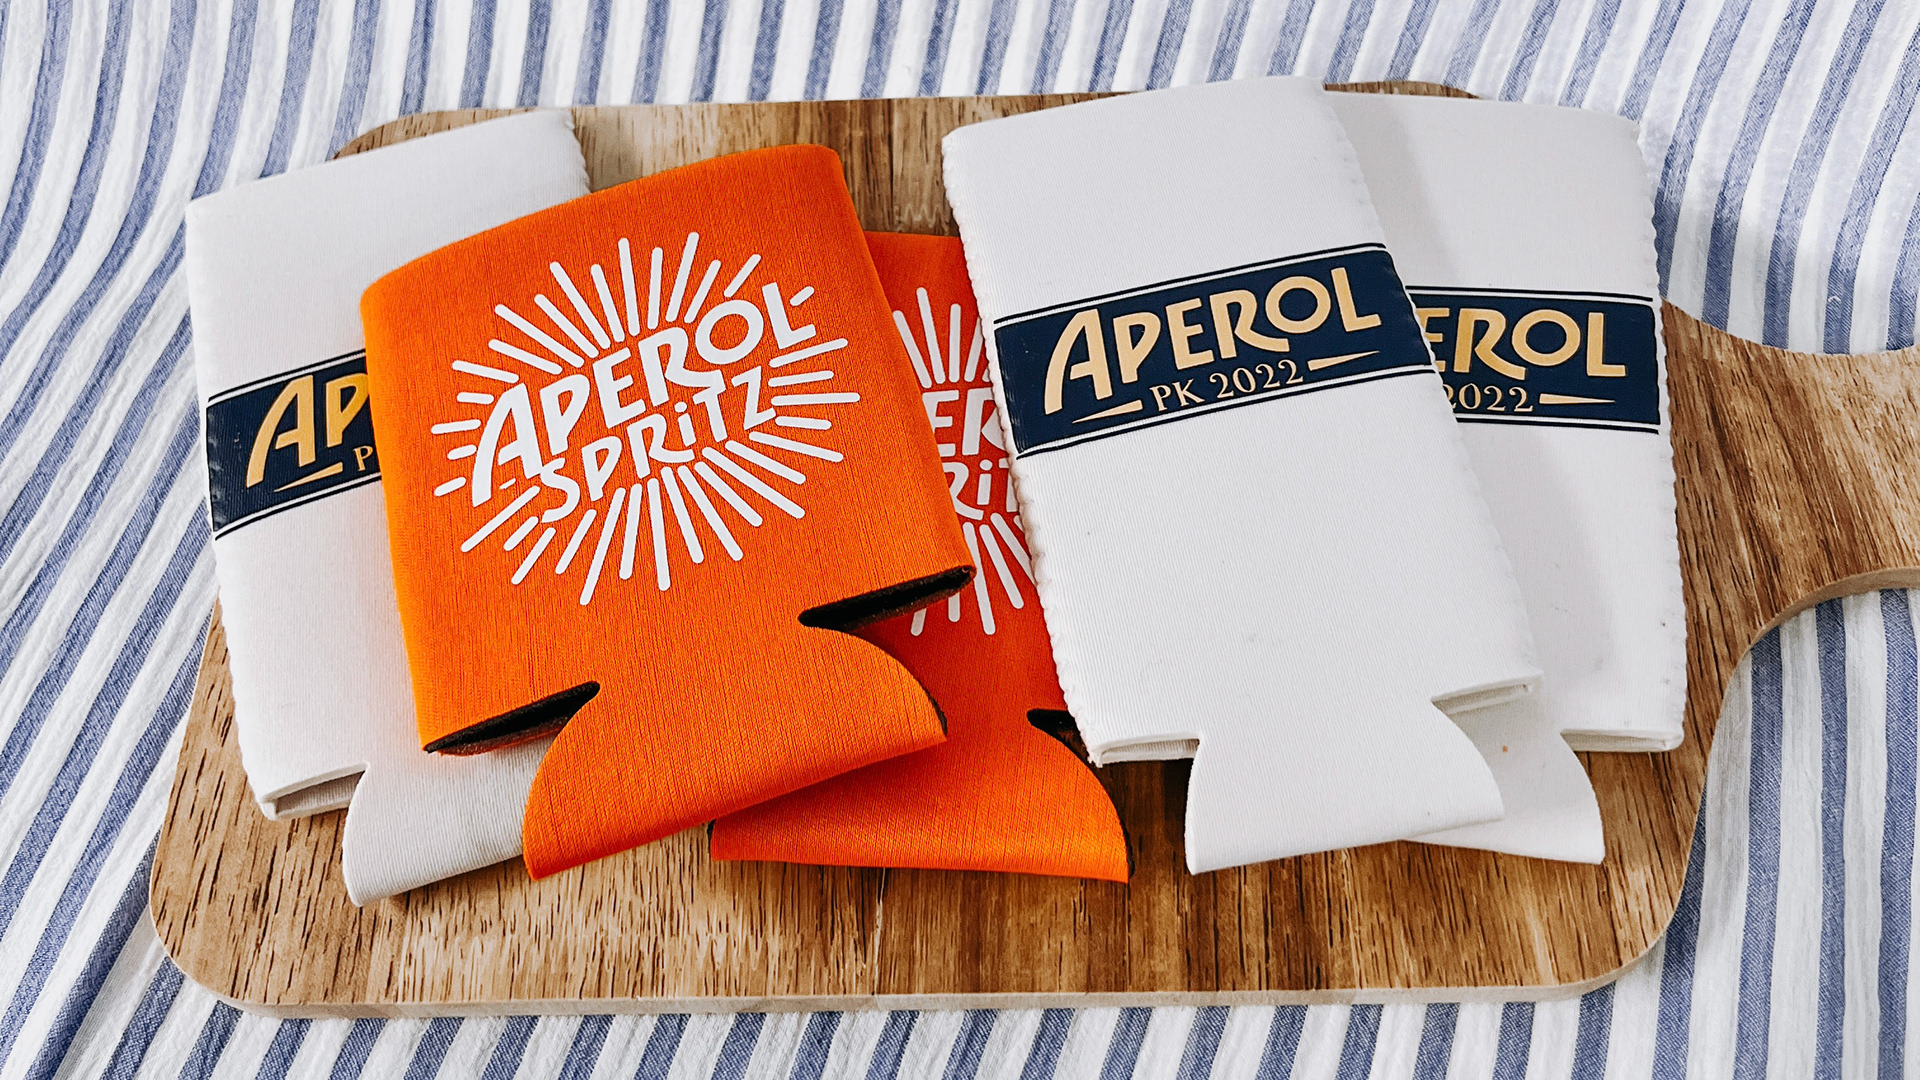
The drinkware did not stop there. Now onto koozies. I decided to incorporate 2 different styles - one for the slim koozies (for the girls) and one for the regular koozies (for the guys). This was also great because I didn't have to worry about the orange colors being different shades for the different styles. I ordered the short orange koozies from amazon (linked here) but you can also find blank koozies at Hobby Lobby for a good price! For the short ones I used the same file I used for the glasses to make the weeding process easier.
The slim koozies were slightly more complicated because I had to do it in two layers. First I uploaded the design to Cricut Design space and did not remove the text to make the base navy layer. Then, I uploaded the "Aperol" text in png format I downloaded online and uploaded it to Design Space. Lastly, to add customization I added the name of the lake that were going to for the party and the year in Arial font. I recommend adding text in upper case to make weeding easier!
If you want access to my Cricut Design project I used to make these to save you the time and effort, fill out the form below! To watch my process for creating these koozies check out my TikTok
Orange Koozie Tutorial | White Koozies Tutorial
WANT THE DESIGN FILE?
submit the form and I will email you access to the Cricut Design file!
Thank you!
DRIED oranges
Another DIY project I took on was drying oranges! I plan on using these as drink garnishes, adding them to a greenery garland for decor. I also thought about repeating this process again with small clementines and add them to paper straws as I think this will feel far more elegant than the crafty-ones I've seen online. These have been great to have on hand for non-party projects that have come up like charcuterie boards, bach nights etc. so I think this is something I will continue to do just to have them on hand - they make everything feel so much more elegant!
To make these, I cut the oranges into thin slices and then popped them in the oven at 175 degrees for 7 hours. Pro-tip: I realized afterwards I should've cut these a bit thinner so go a bit thinner than you think you may need to.
For the full tutorial on how I did these click the link: Dried Oranges Tutorial
GOLD TRAY diy
I am a big proponent of investing in trays and containers, but if you're willing to roll up your sleeves and get your hands dirty, investing time not money. With Goodwill + Rub n' buff the world is your oyster. I found this ornate silver tray at Goodwill for $7. It was super heavy and great quality but the paint was peeling in some places, and, to match the color scheme of the party, I knew I wanted it to be gold. I took it home, put on some gloves and got to rubbing and buffing. I got mine on amazon (linked here) in "Antique Gold" but they have it in other shades. Also, if you need this same day, you can also purchase it at your local Hobby Lobby!